Recovery Mode vs DFU Mode: Which Should You Use?
Your iPhone is frozen on the Apple logo, or it’s stuck showing “Connect to Computer,” and someone on a forum just told you to “put it in DFU mode.” Before you touch a single button, it’s worth understanding what you’re actually about to do. Recovery Mode vs DFU Mode is one of those comparisons that sounds intimidating but comes down to a fairly simple idea: one is Apple’s supported way to fix a broken iPhone, and the other is a much deeper, riskier tool that Apple doesn’t officially document at all.
This guide breaks down exactly what each mode does, how they’re different, and — most importantly — how to figure out which one your situation actually calls for. You’ll also learn about a genuinely new option in iOS 26 that lets some iPhones restore themselves without a computer at all.
The Quick Answer — Which One Do You Actually Need?
If you’re mid-panic and just want the short version, start here.
| Your Situation | Mode You Likely Need |
|---|---|
| Apple logo stuck on screen for several minutes, no progress bar | Recovery Mode |
| iPhone stuck in a boot loop (restarts over and over) | Recovery Mode first, then DFU if that fails |
| Update failed and phone won’t finish starting up | Recovery Mode |
| iTunes, Finder, or the Apple Devices app can’t recognize your iPhone at all | DFU Mode |
| You need to downgrade to an older iOS version (while Apple still signs it) | DFU Mode |
| Recovery Mode gives repeated errors (like error 4013 or similar) | DFU Mode |
| Screen is completely black with no logo, no cable icon, nothing | Try a force restart first, then Recovery Mode |
When Recovery Mode Is Enough
For the vast majority of software problems — a failed update, a phone stuck on the Apple logo, or a device that won’t finish restarting — Recovery Mode is the right first step. It’s the officially supported path, and Apple’s own troubleshooting flow leads here before anything else.
When You Genuinely Need DFU Mode
DFU Mode exists for the smaller number of cases where Recovery Mode can’t reach the problem — usually deeper firmware corruption, a jailbreak gone wrong, or a device that Recovery Mode simply can’t detect. It’s also the only option if you need to downgrade your iPhone’s software, since Recovery Mode won’t let you install anything older than what you’re currently running.
What Recovery Mode Actually Does
How It Works
Recovery Mode works through something called iBoot, the part of your iPhone’s software that acts like a gatekeeper during startup. Every time your iPhone boots up normally, iBoot checks that the software trying to load is legitimate and signed by Apple. When you put your iPhone into Recovery Mode, you’re essentially asking iBoot to pause and wait for instructions from a computer instead of continuing the normal startup process.
Because iBoot stays active the whole time, Apple maintains control over what can actually be installed on the device. That’s a meaningful safety feature — it means Recovery Mode can’t be used to load unauthorized or unsigned software, which keeps the process predictable and reversible in most cases.
What You’ll See on Screen
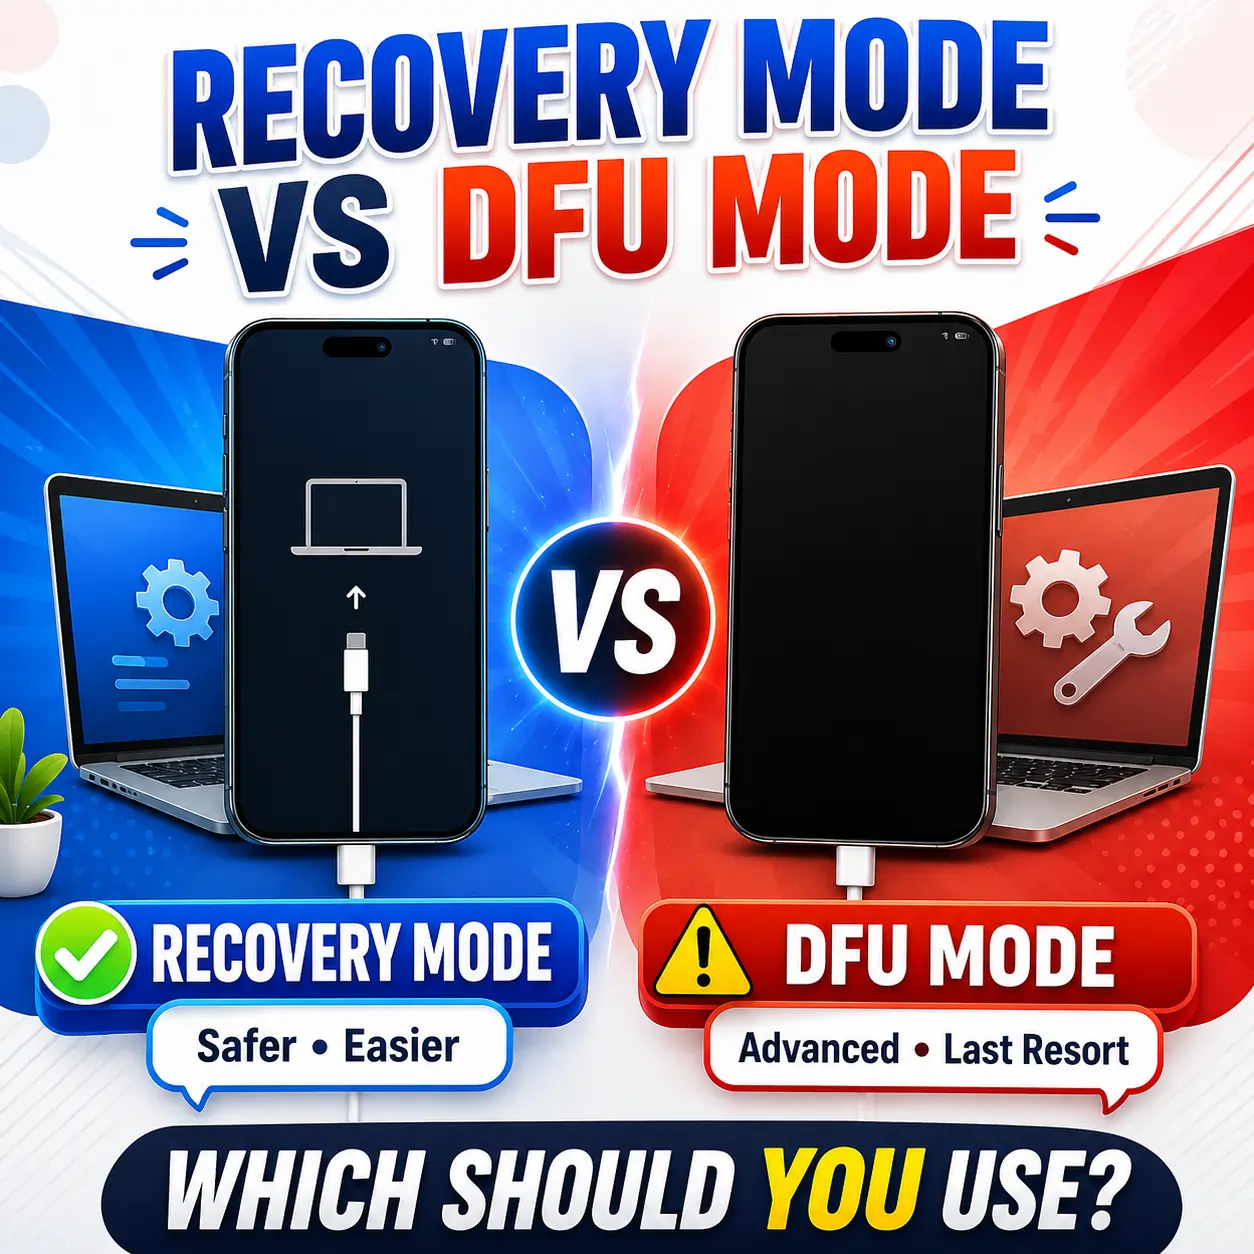
You’ll know you’re in Recovery Mode because your iPhone shows a “Connect to Computer” screen (older devices showed a USB cable and iTunes icon; iOS 26 shows a simplified version of the same idea). If you connect it to a Mac or PC, Finder or the Apple Devices app will recognize the device immediately.
What It Can and Can’t Fix
Recovery Mode handles the situations most people actually run into:
- A stuck or failed iOS update
- An iPhone that won’t get past the Apple logo
- A device your computer says is “in recovery mode” already
- Repeated Recovery Assistant loops that don’t resolve on their own
It generally can’t help if:
- The device isn’t recognized by a computer at all, even in Recovery Mode
- The problem is caused by deeper firmware or bootloader corruption
- You need to install an older iOS version than the one currently on the device
What DFU Mode Actually Does
How It Bypasses iBoot Entirely
DFU stands for Device Firmware Update. Unlike Recovery Mode, DFU skips iBoot completely. Your iPhone doesn’t load any part of iOS or the bootloader — it just sits there, ready to accept new firmware directly from a connected computer. This is why DFU Mode is often described as “lower level” than Recovery Mode: it works even when the software Recovery Mode depends on is too damaged to load.
Why Apple Doesn’t Officially Document It
This is worth being upfront about: DFU Mode is unsupported and undocumented by Apple for everyday users. You won’t find an official Apple Support page walking you through DFU the way you will for Recovery Mode. It exists mostly for developers, engineers, and advanced troubleshooting — Apple built it, but it was never designed as a consumer-facing feature the way Recovery Mode was.
That doesn’t make it unsafe to use correctly. It just means you should treat instructions for it (including this article’s) as community-verified best practice rather than something pulled directly from an Apple manual.
What It Can Fix That Recovery Mode Can’t
Because DFU bypasses iBoot entirely, it can resolve problems that are too deep for Recovery Mode to touch, including:
- A device that Recovery Mode can’t get to respond correctly
- Corrupted firmware that prevents the bootloader itself from loading
- Situations where you need to reinstall iOS from the absolute lowest level possible
It’s also the only way to downgrade an iPhone to an older iOS version, as long as Apple is still “signing” that version. Recovery Mode will only let you update or restore to the current or newer software.
Why It’s Riskier — No Built-In Safety Net
Because DFU skips the checks that Recovery Mode relies on, there’s less room for error correction along the way. A DFU restore always erases the device completely — there’s no “Update without erasing” option the way there is in Recovery Mode. If you go this route, back up first if your device still connects to a computer at all.
Recovery Mode vs DFU Mode: The Real Differences
| Recovery Mode | DFU Mode | |
|---|---|---|
| Screen appearance | Shows a “Connect to Computer” screen with a cable icon | Screen stays completely black the entire time |
| Uses iBoot? | Yes | No — bypasses it entirely |
| Officially documented by Apple? | Yes | No |
| Data loss | Only if you choose Restore (Update preserves data) | Always erases the device |
| Can downgrade iOS? | No | Yes, if Apple still signs that version |
| Difficulty to enter | Straightforward | Requires precise button timing |
| Best for | Most software issues, failed updates, boot loops | Deep firmware corruption, downgrades, devices Recovery Mode can’t fix |
The screen is actually the easiest way to tell which mode you’ve landed in if you’re not sure. If you see any Apple logo or connect-to-computer graphic, you’re in Recovery Mode. If the screen is totally black with nothing on it, and your computer detects a device, you’re in DFU.
New in 2026: You May Not Need a Computer at All
One update that most guides on this topic haven’t caught up to yet: starting with iOS 26, Apple added a feature called Recovery Assistant that changes part of this equation.
What Recovery Assistant Does
If an iPhone running iOS 26 or later has trouble starting up, it can now boot into a version of Recovery Mode on its own and attempt to diagnose and fix the issue automatically — no computer required for that first attempt.
How Wireless Restore With Another Apple Device Works
If the automatic repair doesn’t resolve things, Recovery Assistant can offer to restore your iPhone using another nearby Apple device — an iPad or another iPhone running iOS 18 or later — instead of a Mac or PC. The process works similarly to AirDrop: your locked device displays a six-digit code, you enter it on the assisting device, and the working device downloads and sends over the software your iPhone needs to recover.
This is genuinely useful if you don’t own a computer, or you’re away from home when your iPhone runs into trouble and only have another Apple device with you.
When You’ll Still Need a Mac or PC Anyway
A few important caveats:
- This feature works for Recovery, not DFU. DFU Mode still requires a traditional Mac or PC connection with Finder, the Apple Devices app, or iTunes.
- You still need a second Apple device running a recent enough OS version to assist — Recovery Assistant doesn’t restore a phone with zero outside help in every case.
- Older iPhones that can’t run iOS 26 don’t get this feature at all.
If your iPhone is completely unresponsive and doesn’t connect to anything, this guide on how to fix an iPhone that won’t turn on walks through the full troubleshooting order, including what to try before you ever reach Recovery or DFU Mode.
How to Enter Recovery Mode (iPhone 17, Air, Pro, Pro Max, and Earlier Face ID Models)
The button sequence has stayed the same across every Face ID iPhone, from the iPhone X through the current iPhone 17, iPhone Air, iPhone 17 Pro, and iPhone 17 Pro Max, based on Apple’s official recovery mode instructions:
- Connect your iPhone to a computer with a USB cable.
- Open Finder on a Mac, or the Apple Devices app on Windows.
- On the iPhone, quickly press and release Volume Up.
- Quickly press and release Volume Down.
- Press and hold the Side button until you see the Connect to Computer screen.
Once your computer detects the device, choose Update first — this reinstalls the software without erasing your data. Only choose Restore if Update doesn’t resolve the problem, since Restore wipes the device completely.
For a full breakdown of what to try before and after this step, including force restarts and what to do if your data isn’t backed up, see the complete iPhone troubleshooting walkthrough.
How to Enter DFU Mode (And Why You Should Be Careful)
DFU requires much more precise timing than Recovery Mode, and it’s easy to accidentally end up back in Recovery Mode instead if you’re a fraction of a second off.
- Connect the iPhone to a computer and make sure Finder (Mac) or the Apple Devices app (Windows) is open.
- Quickly press and release Volume Up.
- Quickly press and release Volume Down.
- Press and hold the Side button until the screen goes completely black.
- While still holding the Side button, also hold Volume Down for about 5 seconds.
- Release the Side button, but keep holding Volume Down for another 10 seconds.
- If the screen stays black and your computer shows it has detected a device, you’re in DFU Mode. If the Apple logo appears at any point, the timing was off — start over from step 1.
Warning: A DFU restore erases everything on the iPhone, with no option to preserve data the way Recovery Mode’s Update option does. If your device still connects to a computer at all before you begin, back it up first through iCloud or a computer backup.
Before You Try Either Mode
A few steps are worth doing first, regardless of which mode you eventually need.
Try a Force Restart First
Most stuck-Apple-logo situations resolve with a simple force restart, which doesn’t touch your data at all: quickly press Volume Up, quickly press Volume Down, then hold the Side button until the Apple logo appears. It’s worth trying before jumping straight to Recovery or DFU Mode.
Back Up Your Data If the Device Still Connects
If your iPhone still connects to a computer in any capacity, take the extra few minutes to back it up through Finder or the Apple Devices app before you choose Restore in Recovery Mode or attempt a DFU restore. If iCloud backup was already turned on, your photos and data are likely already backed up automatically as long as the phone had Wi-Fi access recently.
If you’re unsure how much space a fresh backup or restore will need, the iPhone storage calculator can help you plan ahead, especially if you’re setting up a new device afterward.
When to Stop and Go to Apple Support Instead
If you’ve worked through a force restart, Recovery Mode, and DFU Mode and the iPhone still shows no signs of life — no sound, no vibration, no recognition by a computer even after a full charge — the issue is very likely hardware, not something a restore can fix. At that point, an Apple Store, an Apple Authorized Service Provider, or Apple’s mail-in repair option is the right next move.
Frequently Asked Questions
Does DFU mode delete everything on my iPhone?
Yes. Unlike Recovery Mode, which lets you choose Update to reinstall software without erasing data, a DFU restore always wipes the device completely. There’s no way around this, so back up beforehand if your iPhone still connects to a computer.
Can I do a DFU restore without a computer?
No. Recovery Assistant’s wireless restore feature in iOS 26 only applies to Recovery Mode. DFU Mode still requires a traditional connection to a Mac or PC running Finder, the Apple Devices app, or iTunes.
Is DFU mode safe?
It’s safe when done correctly, but it carries more risk than Recovery Mode because it bypasses the checks iBoot normally performs and always erases your data. The main danger isn’t the mode itself — it’s rushing into it without backing up first, or mistiming the button sequence and having to restart the process repeatedly.
Why does my iPhone keep going into Recovery Mode?
This usually points to a failed update, a corrupted piece of system software, or in some cases a hardware issue that’s preventing normal startup. If Recovery Assistant repeatedly can’t resolve it on its own, and choosing Update in Recovery Mode doesn’t help, DFU Mode or a visit to Apple Support is the next step.
What’s the difference between Recovery Mode and factory reset?
They’re related but not the same thing. A factory reset (Erase All Content and Settings) is something you do from a working iPhone’s Settings app to wipe it intentionally. Recovery Mode is a troubleshooting state you enter when the phone isn’t working properly, and choosing Restore within Recovery Mode has a similar erasing effect, but it’s reached through a completely different process.
Do iPhone 17 and iPhone Air use different button combinations?
No. Every current Face ID iPhone — the iPhone 17, iPhone Air, iPhone 17 Pro, and iPhone 17 Pro Max — uses the same Volume Up, Volume Down, then Side button sequence for both Recovery and DFU Mode. Apple hasn’t changed this combination across recent generations.
Conclusion
When it comes down to it, Recovery Mode vs DFU Mode isn’t really a hard choice once you understand what each one is for. Recovery Mode is Apple’s supported, documented way to fix the vast majority of software problems, and it’s almost always where you should start. DFU Mode exists for the smaller number of cases Recovery Mode can’t reach — deep firmware issues, downgrades, or a device Recovery Mode simply won’t detect — and it comes with more risk and zero built-in safety net for your data.
If you’re dealing with a frozen or unresponsive iPhone right now, try a force restart first, then Recovery Mode, and only move on to DFU Mode if Recovery genuinely can’t solve the problem. And if you’re on iOS 26 or later, don’t overlook Recovery Assistant — for a growing number of situations, you might not need a computer at all.